Build a Strong Back with Yoga!
There are different Yogasanas for strengthening different areas of the body and as well as provide pain-relief. Particularly our spinal cord and back are put into strenuous drills every day, which leads to severe discomfort sometimes. There are few Yogasanas that help with getting the back stronger and relieve from irritable back-pain. These Yogasanas are fairly easy to do and will yield in good results.
Anandaasna is nothing but lying flat on the floor and relaxing your body. This is the starting point for further Yogasanas aimed at your back.
Steps: Lie on the back, relax the whole body and keep the body in this position for 2 to 5 minutes.
Benefits: This pose will loosen all the muscles and will give a most-comfortable feeling.
[The best home remedies for consideration of ADHD ]
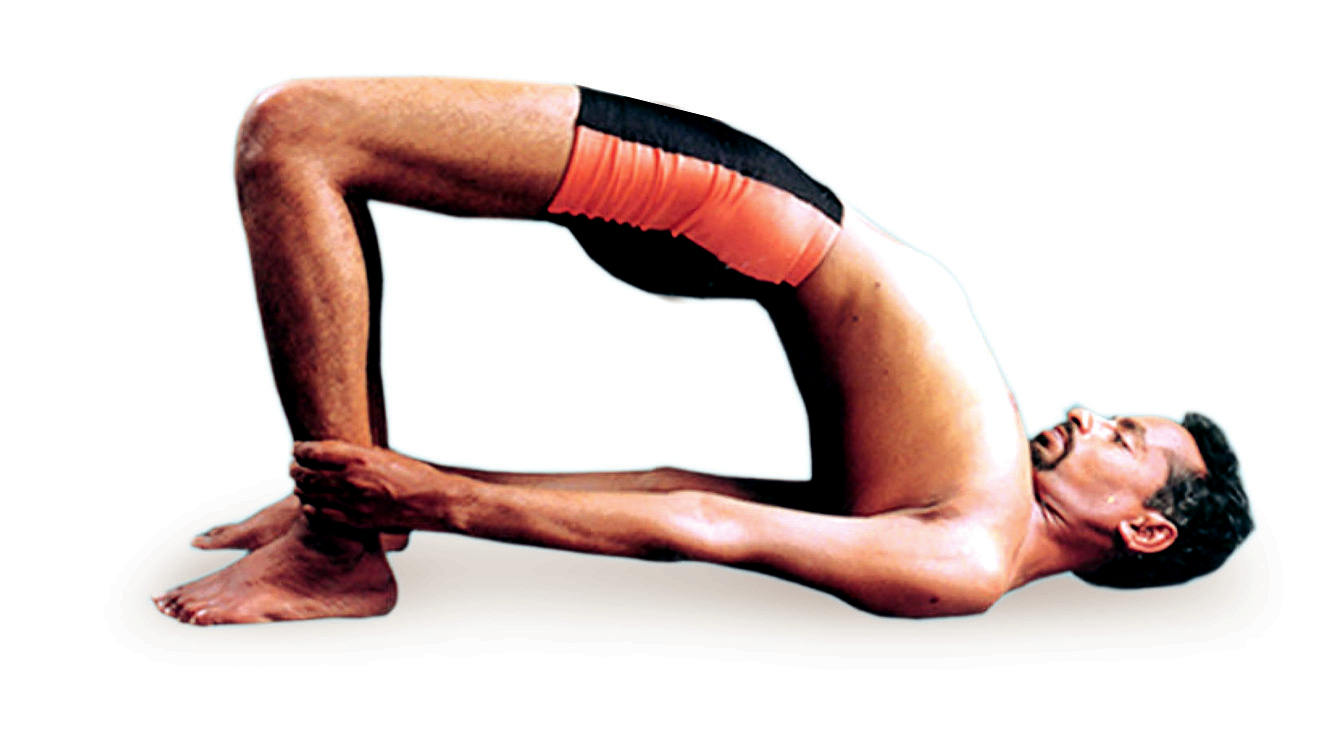
Setu Bandana Sarvangasana (Bridge Pose)
Steps:
First lie on your back. Then fold your knees and bring the ankles closer to your buttocks. Slowly lift your buttocks, press your arms and feet on the floor; lift your chin and broaden your shoulder and arms; stay in this position from 30 seconds to 1 minute.
Benefits: Stretches the muscles of the spine, back, neck and chest.
Steps: First start a “table-top” position on your hands and legs; keep the elbows; wrists; and shoulders perpendicular to the floor; keep the head in neutral position at the center; exhale and raise your spine towards ceiling; inhale and lower your spine, keep the chin up. Repeat the pose 3, 4 times and come back to normal position.
Benefits: Stretches the back torso and neck.
Pavana Muktasana (Wind Releasing Pose)
Steps: Sit and keep your legs straight. Relax and keep your back upright and straight. Raise the left leg slightly off the floor, clasping your fingers under, inhale deeply; exhale slowly and simultaneously raise your thighs towards chest; lower your head and touch the knee-cap with the forehead or nose; your back can bend slightly for this; inhale and straighten up your head, and lower and flatten your left leg (but don’t touch the floor with your foot). Repeat the pose 5 times each for the right leg and left leg.
Benefits: Your back muscles, buttocks, spinal cord, hips and necks – all get stretched at the same time.
Sarva Hita Asana (Hands crossing pose)
Steps: Standing and crossing the arms above the head position. Keep the legs apart 6 to 8 inches; inhale and slowly raise the arms sideways and cross them above the head; rotate the arms, right and left crossing them alternatively; exhale while lowering the arms.
Benefits: You can feel the whole body relaxing, mind getting calm, back muscles getting relaxed and strengthened as also the shoulder joints.
Steps: Lying on your stomach, stretch and keep your arms at the sides; forehead on the mat; legs straight behind you; press your weight evenly on both feet; slowly while inhaling raise your head and look forward; lift your chest and arms; lift your spine upwards and slowly extend your arms towards your feet. Your body-weight will be resting on your lower ribs, and belly; raise your arms parallel to the floor; stay in this position for 30 to 60 seconds; and then return to starting position.
Roll back and relax your body in Anandasana.
Benefits: Strengthens your back muscles; improves flexibility in the back; specifically recommended for relieving back-pain and sciatica.
Practice tips important for all the above poses:
Learn these yoga poses from an experienced yoga master and practice them as suggested. Start with easy steps first, and then go forward. Always follow the instructions carefully, always listen to your body, and go as the body permits.
Find a good Yoga Studio or Provider at https://www.vydya.com/yoga.htm